I love animation, antiques, photons, trigonometry, and the visible portion of the electromagnetic spectrum. How to bring them all together in one project? 3D-printing!
For subject matter I went with the classic zoetrope trope: Eadweard Muybridge's galloping horse. And obviously rainbows as well because they are awesome.
Strategy: Project the frames of our animation at discrete angles via rows of "pixels" in the form of tiny, angled rectangular apertures filled with VeroClear & Vivid Vero Colors.
Challenge: How to squeeze in the maximum number of pixels without them overlapping?
Solution: Arrange rows using a "wave" pattern, with minimally different adjacent angles, oscillating back and forth as needed. Offset the rows horizontally to distribute the pixels evenly.
![]()

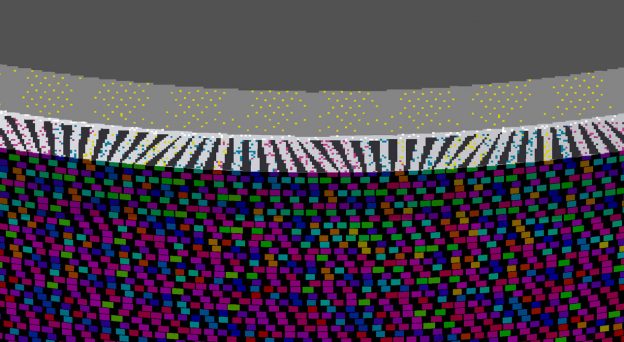
Here you can see a single slice of voxels intersecting a surface shader I used in the design process. From the top: Dark-grey is air. The light grey ring is support material with some yellow for stiffness. There's a thin translucent white layer on the inside to scatter the light, then the apertures.

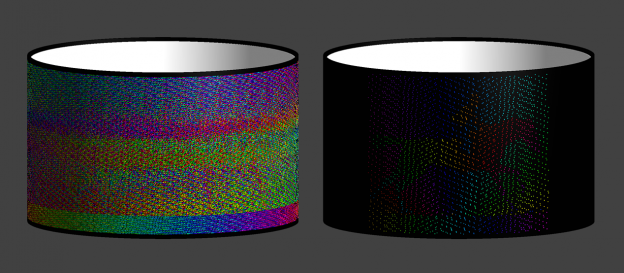
Left: All animation frames as rendered by the surface shader. Right: A single frame.
Print it!

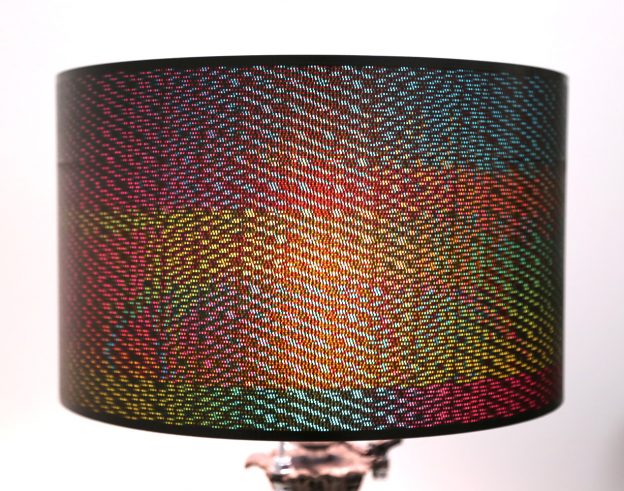
The shade took over 3 days to print and almost maxed out the height of the J750's build volume. It's 4mm thick, 18cm tall and 30cm in diameter.
As you can see there's quite a bit of overlap between frames - one can see 3 frames simultaneously from any given angle, but... If you squint you can kinda see a horse! There's room for optimization, but it works!
Let's light it up and make it spin!
I toyed with the idea of using a fan and turbine, though ultimately decided to mount a geared motor over the bulb. The turbine can stay because it looks cool, and I already super-glued it in. It's printed on our Stratasys F450mc in Nylon 12 w/ Carbon Fiber.


All About That Base:
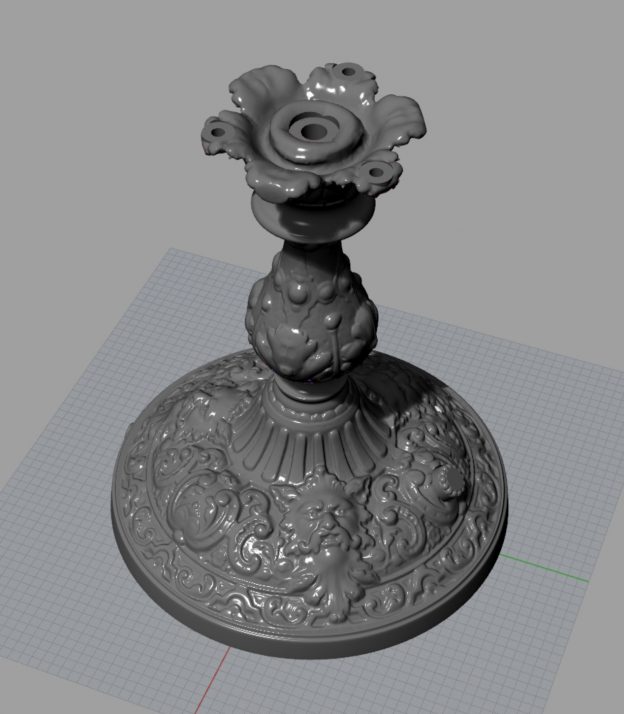
For the base, I felt a Victorian aesthetic would be appropriate, and I'd been looking for an excuse to play with our Artec 3D scanner. I found a beautiful ornate cast-iron lamp base and got scanning. I only scanned half of it, since this was easier that trying to scan it 360. The patterns repeat, so I could work with a good partial scan.
I used Rhino to clean up the mesh, make everything symmetrical, scale it up a tad, and prep for hardware and electronics.

I like how there are angry bearded dudes on this thing.
I printed it in 4 sections on our Stratasys J750 so I could get almost the entire surface glossy. (It seems like this is how it might have been cast originally.) It's printed in VeroBlackPlus with a 0.5mm clear-coat added in GrabCAD Print for an extra glossy finish. I might patina it later.

Putting it all together:
 Left: The assembled & wired base. I found some period-perfect fabric-covered cord from Sundial Wire. The motor's power supply and speed control are tucked away in the bottom section.
 Above: The motor mount and clutch plate were printed on our Stratasys F370 in Natural Translucent PLA. I used threaded rods so I could dial in the height and level the motor mount. There's a roller bearing between the shade and motor for smooth starts & stops.
Here's a video of it in action:
I'm quite proud of this lamp. It's a functional anachronism and probably the coolest thing I've ever printed. It's hard to see the horse if you don't know to look for it, but once you see it it can't be unseen.
I'm already thinking about the best next iteration: Higher fidelity animations could be rendered with a reduced the frame width... but a purely abstract geometric-rainbow-gradients loop could also be fun...
Want more 3D printing tips from Case? Check out 3D Printing: Industry Secrets eBook where Case shares some of his best tips and tricks!


